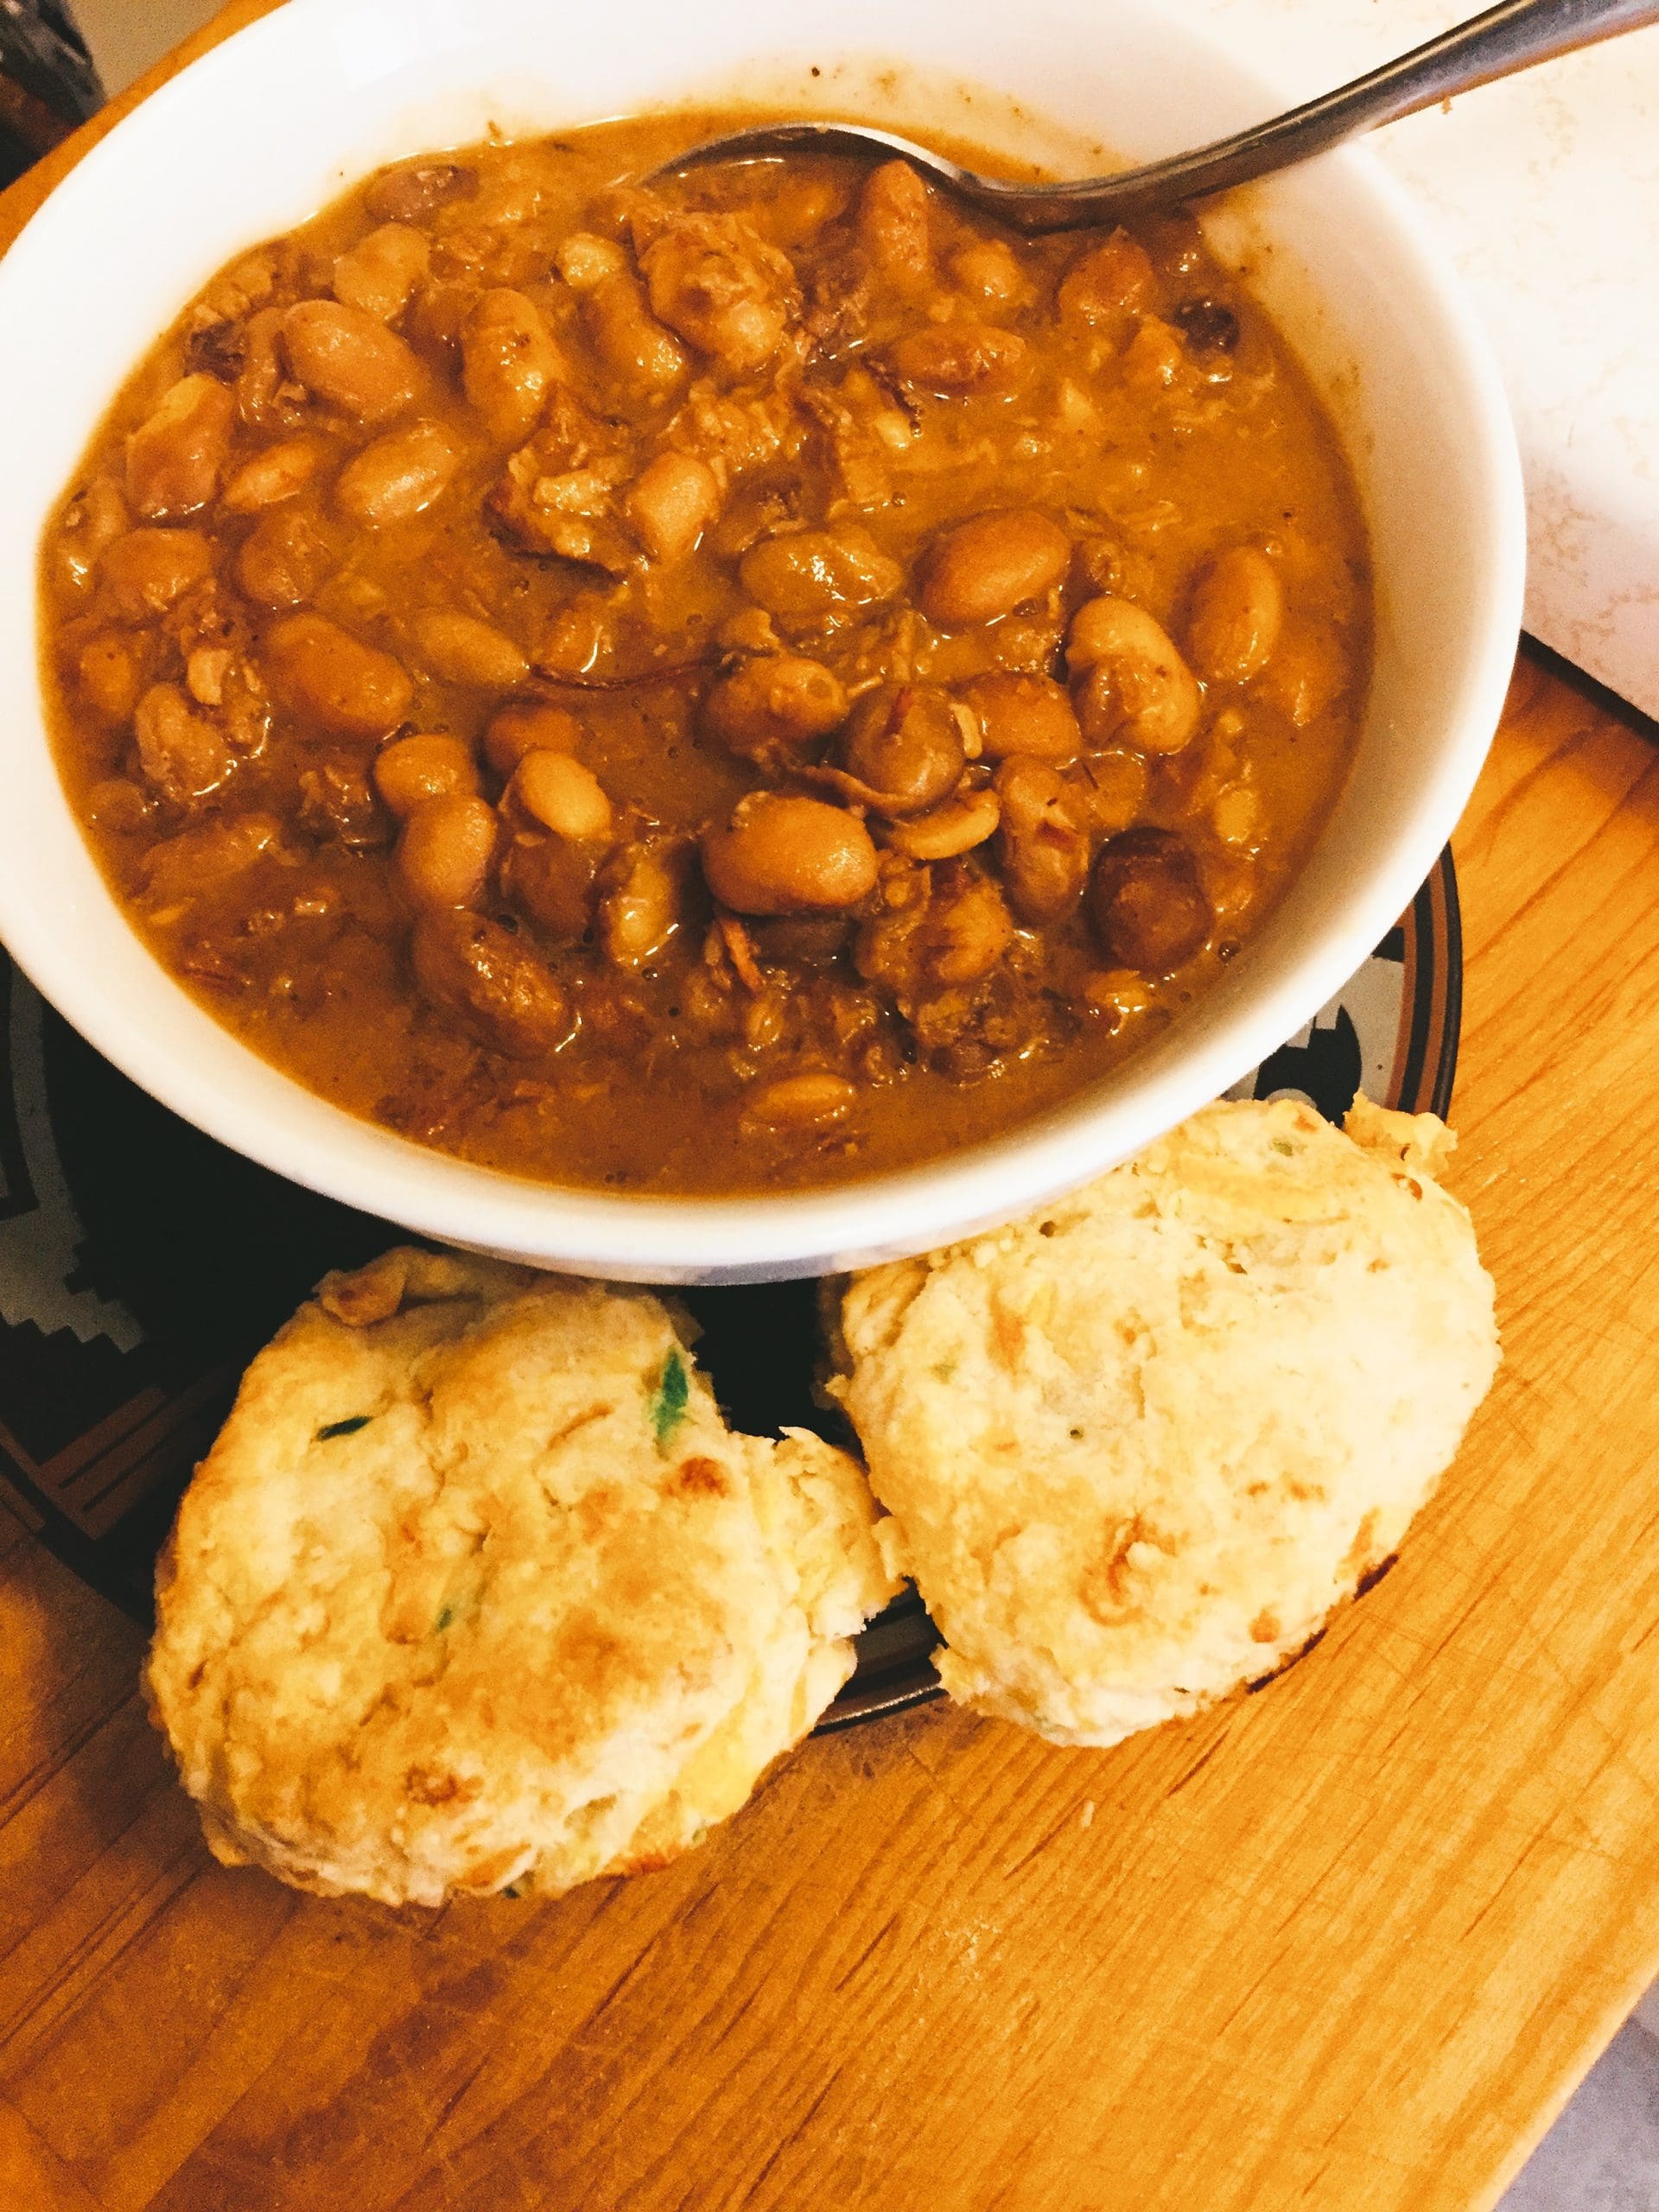
Smoked Cheddar Jalapeno Biscuits

Biscuit Exploration

For a while, I was on a biscuit-making kick. On top of buttermilk biscuits, I made various drop biscuits – including the copycat Red Lobster Cheddar Bay, cheddar cheese biscuits,  bacon biscuitscinnamon sugar biscuits, and cream cheese and chives. It took me a while to get the hand of making this fluffy, warm quick bread, but once I did, I was off to the races. There are still various types I still want to make. 

Smoked Cheddar

I was lucky enough to get my hands on a pound of homemade smoked cheddar cheese. I have experimented with smoked flavored cheese, but never the real deal. While a pound of smoked cheese goes a long way, I have several plans for this cheese. The first is these amazing smoked cheddar jalapeno biscuits which pair beautifully with my Cowboy Beans. Using a cast-iron skillet instead of a sheet pan, I made these from my base buttermilk biscuit recipe. I love how the biscuit bottoms get slightly crispy on the bottom yet remain super tender and soft on the inside.

Smoked Cheddar and Jalapeno Biscuits

These biscuits are fluffy, cheesy, and spicy that pair well with beans, chilis, and stews.
Prep Time: 10 minutes
Cook Time: 14 minutes
Total Time: 54 minutes
Cuisine: American, Quick Breads, Vegetarian
Servings: 6
Calories: 361.25kcal
Author: Tay M.

Ingredients

  • 2 cups all-purpose flour plus extra for dusting
  • 2 tsp baking powder
  • 1 tsp salt
  • 1 tsp baking soda
  • 1 stick unsalted butter cut into small cubes
  • 1 tsp honey or sugar
  • 8 oz buttermilk
  • ½ cup grated smoked cheddar
  • ½ cup grated sharp cheddar
  • 1 large jalapeno pepper grated

Instructions

  • Combine flour, baking powder, salt, baking soda, sugar (if using honey, add with buttermilk) in the bowl of a food processor. Pulse a few times to combine.
  • Add butter to the flour mixture and pulse until it resembles wet sand with a few pea-sized pieces of butter remaining.
  • Add the flour-butter mixture to a large bowl, then add cheeses, jalapeno.
  • Add buttermilk mixture in 2 to 3 ounces until it is incorporated; all of the liquid may not be used. Depending on your flour, you might need an ounce or two more.
  • Lightly flour your workspace, drop your dough, and knead until just combined about 3 to 6 times.
  • Flour a rolling pin and roll dough into a rectangle about an inch in thickness. Fold the dough like you would a letter. Repeat this process twice more.
  • Cover and rest the dough in the refrigerator for 30 minutes.
  • In the meanwhile, preheat the oven to 425 degrees f.
  • Uncover and roll out once again to about an inch thickness.
  • Cut out the biscuits using a floured 2.5 inch round cutter. Do not twist. Re-roll and cut only once if needed.
  • Bake on an unlined cookie sheet or 8 -inch or 10-inch buttered cast-iron skillet for 7 minutes at 425, then drop the heat to 375 and bake another 7 to 10 minutes.

Notes

If you do not have a food processor, use a whisk to combine ingredients first, then use a pastry blender or two forks to cut the butter into the flour.

Nutrition

Serving: 1g | Calories: 361.25kcal | Carbohydrates: 35g | Protein: 8.96g | Fat: 21g | Saturated Fat: 13g | Trans Fat: 1g | Cholesterol: 55.53mg | Sodium: 492mg | Fiber: 1g | Sugar: 3g | Vitamin A: 171IU | Vitamin C: 4mg | Calcium: 259mg | Iron: 2mg
Share on Facebook Share on Twitter
Tried this recipe?Mention @taysbpkitchen or tag #taysbpkitchen!

Slow Cooker Cowboy Beans

Inspired by Mexican Frijoles Charros and traditional Baked Beans, my Slow Cooker Cowboy Beans (almost sometimes called Ranchero Beans) have smokey and rich in flavor. However, these beans are not as sweet as Baked Beans but have all the spice of Chili Beans.  They make a fantastic stand-alone meal or pair them with protein of your choice in limitless combinations.  They also freeze quite well. The beans can be made in a slower cooker, Instant Pot (pressure cooker), or stovetop.  Additionally, they can be made on a grill or in the oven.  The oven will mimic a slow cooker, and the grill can stand in for a stove. 
 
Charros are Mexican cowboys, one of the original horsemen, and frijoles is Spanish for beans. Furthermore, My Slow Cooker Cowboy Beans are a cross been between baked beans and chili beans.  They differ from Frijoles Charros with the addition of molasses and bell pepper.  The meat used can vary in the original but bacon, ham, and or chorizo are comma.   In addition to bacon,  I use leftover Tri-Tip and Beef Brisket.   Now, if you do not have any leftover brisket and Tri-Tip laying around, you can always make this with all bacon.
 
Initially, I had planned to post my recipe for Chicken Nachos instead; however, I used four recipes to bring the nachos to life. I have posted my Guacamole and Pico de Gallo recipes; Cowboy Beans and Poached Whole Chicken are the final two. 

The Beans

Now it is time to make the  Slow Cooker Cowboy Beans. After 8 hours, I drained the beans, added garlic, dried oregano (Mexican), onions, jalapeno, bell pepper, bacon, Tri-Tip, Beef Brisket, cumin, pepper, chili powder, and molasses.  Set the slow cooker to low and cook for eight hours. Alternatively, you can put them in a big ole pot, bring them to a boil, drop the heat, simmer and cook for 2-3 hours until tender but not broken.  Yep, I forgot to take a pic of this stage.  
 
I like using dried beans for this dish which requires a four to eight hour/overnight soak in water.  There are a couple of quick soaking methods such as the one on the How to Cook Dried Beans guide from Serious Eats. There is a bit of debate about whether or not the beans are to be salted during the cooking process. I am a little old school and I do not salt the bean until they are starting to get tender at the time I also add the tomato.
 
Alternatively, using canned beans instead of dried will shorten the recipe time since there will be no soaking involved. Try to use no salted added canned beans.  I prefer using pinto beans but black beans or a mix of the two are great as well.  Reduce the simmering time to thirty minutes.  No slow cooker would needed to make these Slow Cooker Cowboy beans when used canned beans. To 

The Protein

If you do not have any leftover tri-tip or brisket stated in the Slower Cooker Cowboy Beans, you can easily sub in pulled chicken, pork, or jackfruit. Also, leftover carne asada and or carnitas would be excellent as well.  I have seen other recipes that use ham, chorizo, and soyrizo—of course, using the pre-cook versions in the meat section work very well. 

These beans are easily veganized.  You can sub in your favorite plant-based meat substitutes or omit the meat altogether.  If you do not use any replacement, be sure to add smokey elements such as smoked paprika, liquid smoke, and or chipotles. Diced mushrooms or mushroom powder can provide hardiness. 

Cowboy Beans

Cowboy beans are a great side dish or complete meal that uses leftover or store-bought tri-tip and brisket.
Prep Time: 30 minutes
Cook Time: 8 hours
Total Time: 8 hours 30 minutes
Servings: 20
Calories: 246.35kcal
Author: Tay M.

Ingredients

  • 2 lbs dried pinto beans
  • ¼ lbs sliced tri-tip cut into 1-inch pieces
  • ¼ lbs sliced brisket cut into 1-inch pieces
  • 6 slices of bacon cut into 1-inch pieces
  • 2 medium white onion medium chop
  • 2-4 jalapenos diced (heat is based on your preference. I used two unseeded)
  • 2 red or orange bell peppers medium chop
  • 2 tsp cumin
  • 2 tsp salt or to taste
  • 1 ½ tsp black pepper freshly ground
  • 1 tbsp chili powder
  • ¼ cup molasses
  • 2-3 cups beef broth

Instructions

  • Soak beans in enough water to cover by half for eight hours or overnight covered at room temperature.
  • After the soaking time has lapsed, fry bacon over medium heat until cooking through. Drain the bacon on two layers of paper towels
  • Add jalapenos, onions, and peppers and saute until slightly soft, about 5 to 6 minutes.
  • Drain beans, add veggie mixture, molasses, broth, and spices into the slow cooker. Use extra water to make sure beans are covered. Stir to combine. Turn slower cooker to low and cook for 8 hours.
  • Beans are done once tender, yet firm.
  • Add salt and stir well.

Notes

Store in the refrigerator for up to five days.

Nutrition

Serving: 4g | Calories: 246.35kcal | Protein: 13.95g | Cholesterol: 14.93mg
Share on Facebook Share on Twitter
Tried this recipe?Mention @taysbpkitchen or tag #taysbpkitchen!

Welcome to Tay’s BiPolar Kitchen!

Welcome to Tay’s Bipolar Kitchen.  Please have a seat at my table.  As the name suggests, I have  Bipolar II Disorder and PTSD (non-Military).  Since my teens, I have been dealing with my mental health.  While my symptoms would vary in intensity over the years, things came to a head for me in 2015.  The things I learned crawling out of that hole have laid the foundation for who I am today.  I’m living my best life in my forties!  If you want to know more about my story, check out the “about Tay” page.

Why did I start Tay’s Bipolar Kitchen?

I started this blog to share my mental health wellness journey, in which my love of food and cooking played a big part.  This blog will be part food blog, journaling, and part skill sharing, which have helped me immensely.  There will be informational mental health posts via segments called Menu Talks and Care For You.

On the food side, I will share my recipes (recipes that are not my own will be noted) through the Special of the Month, and other food and cooking-related content will be under Taysty Tips and Tay Tastes Things (again).  Posts involve cooking techniques, methods, tools, equipment, and more.

Sometimes, I’ll infuse my experiences and how I used different methods to make it out of the brier patch.  I am not a licensed therapist.  Please get in touch with a professional or emergency room if you are in a crisis.

I aim to provide information and share experiences to show no one is alone in their struggles.  I wish to combat the stigma associated with mental disorders and help people be open and honest about their mental health.  Please check out my trigger warning before you get started.   

Once again, welcome to my table.  I hope you have a seat.  Let’s talk and get cooking!